.png)
Accepting or Rejecting a Volunteer Registration
When a volunteer signs up for your activity, their registration goes into your dashboard for review. As an admin or charity staff, you can either accept or reject these registrations depending on your activity needs.
- Accepting a registration confirms the volunteer’s spot in your activity. This helps you manage attendance and gives volunteers clarity on whether they can join.
- Rejecting a registration may be necessary if you already have enough volunteers, the volunteer does not meet the activity requirements, or plans have changed. Rejecting ensures you are not oversubscribed and that volunteers understand the status of their application.
Managing registrations this way helps keep communication clear and prevents confusion on the volunteer’s end.
IN THIS ARTICLE
Steps to Take
-
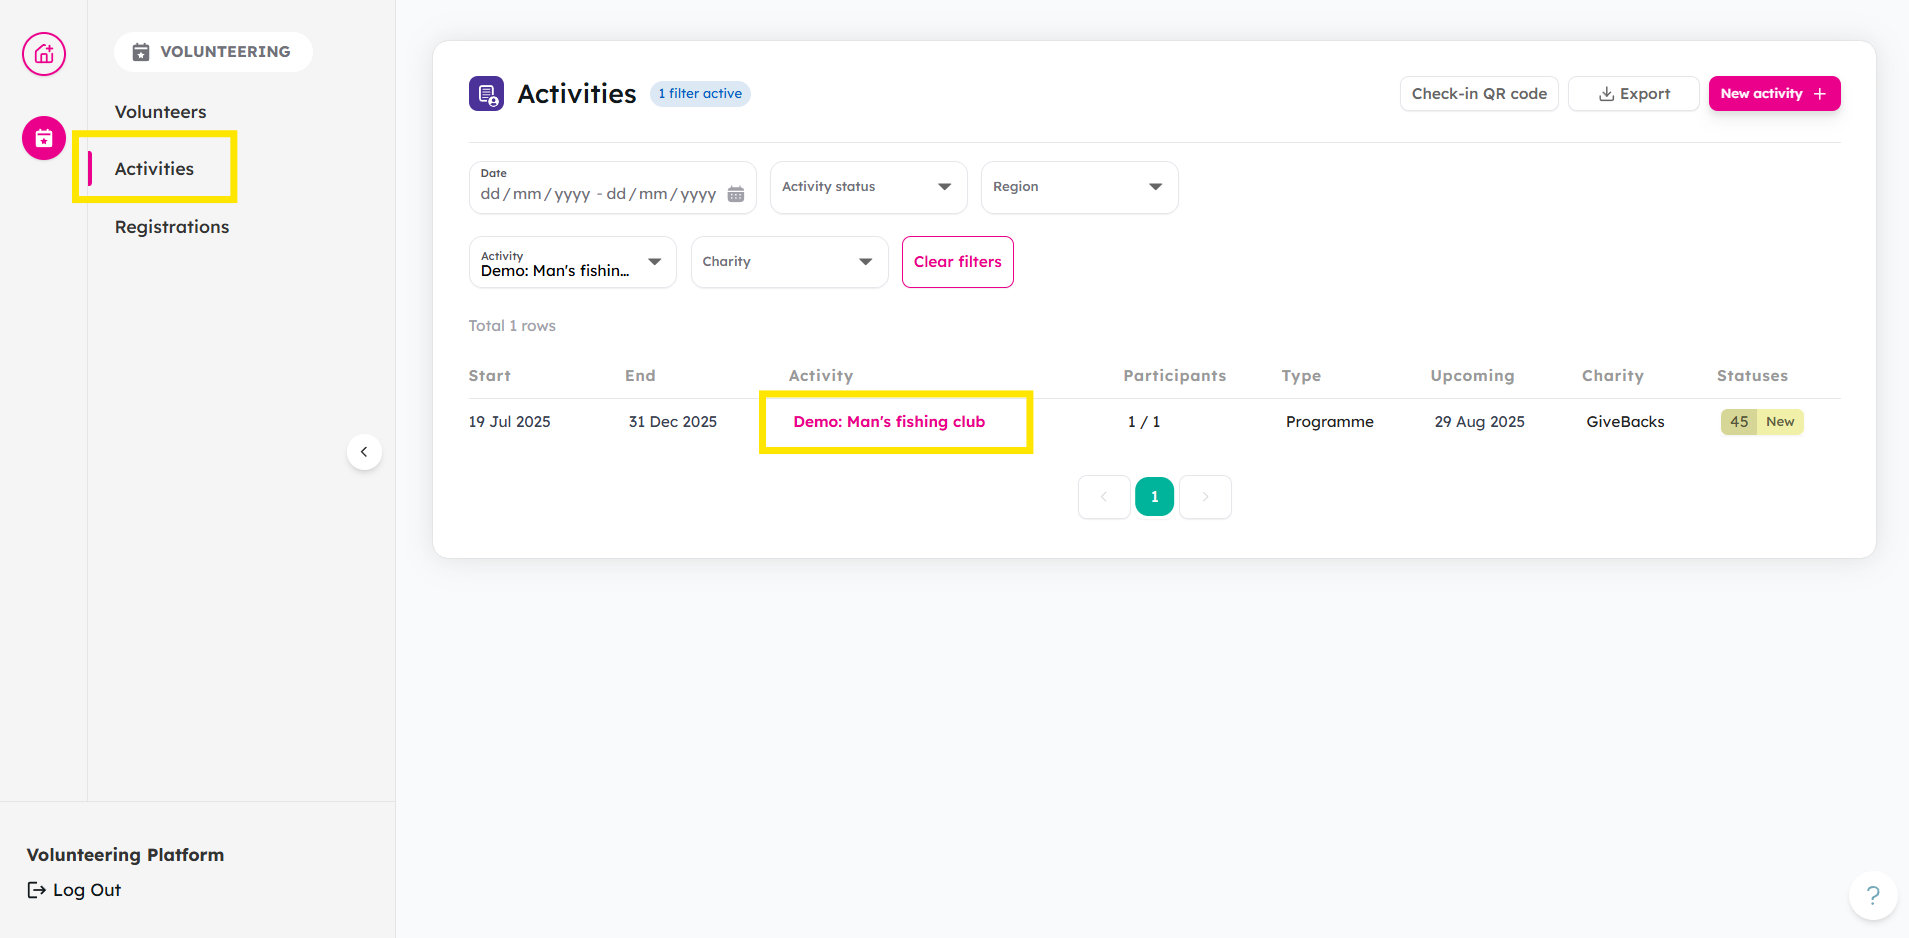
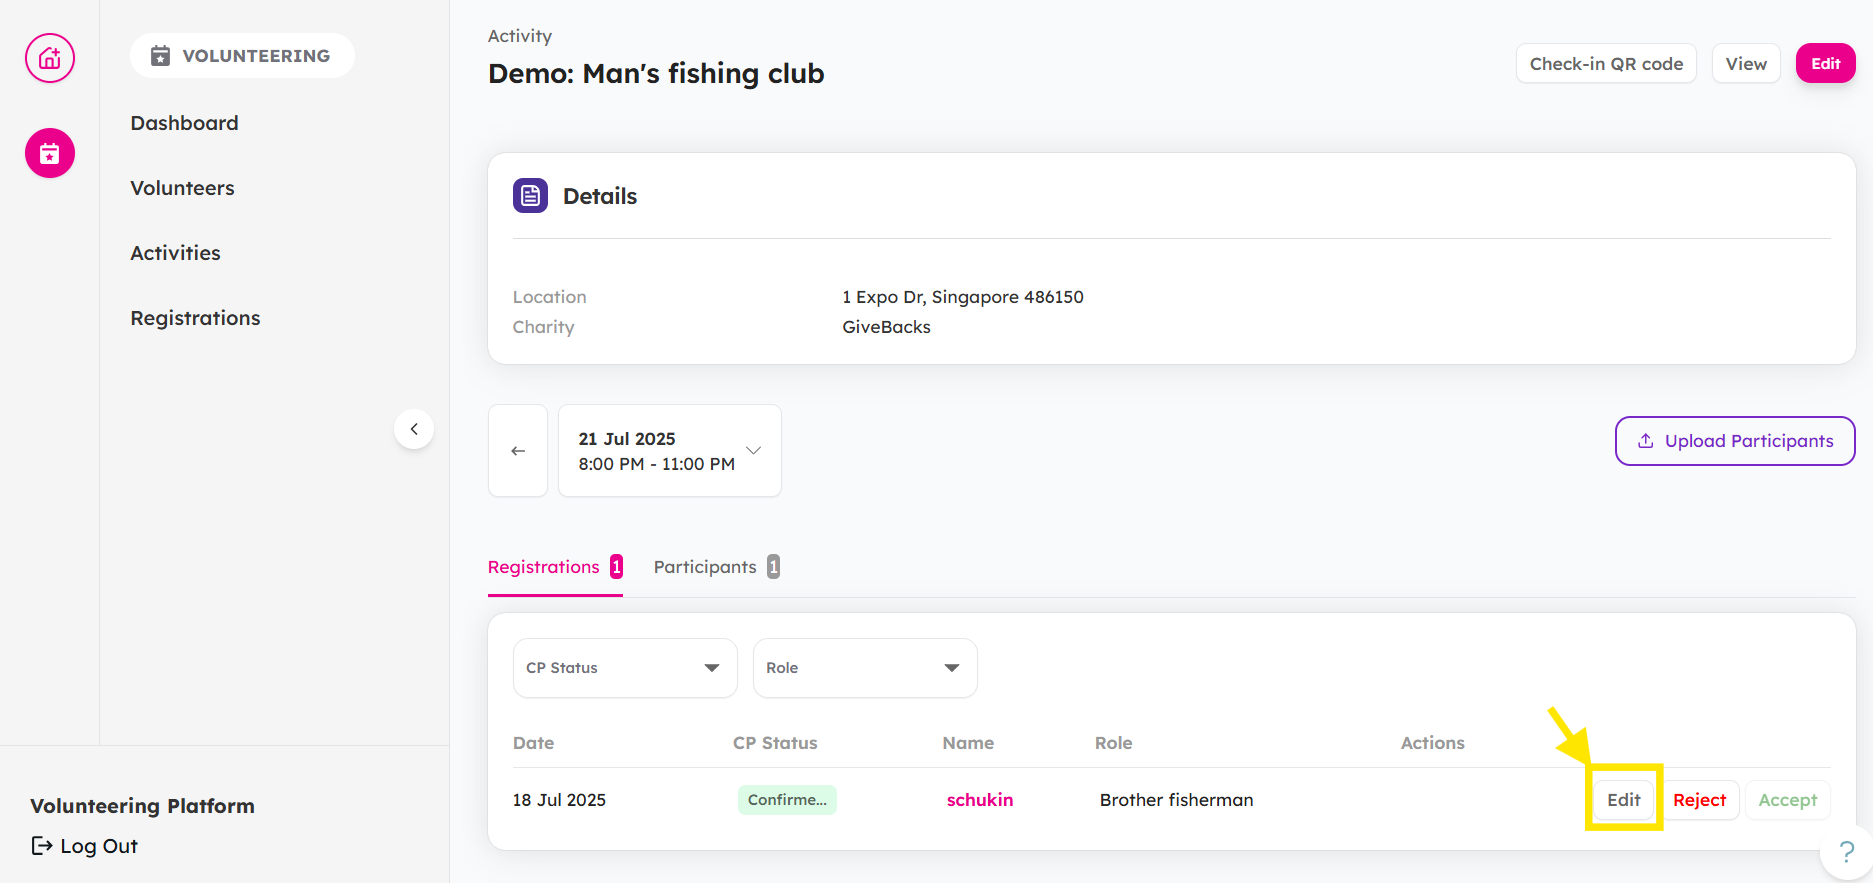
From your Activities tab, click your Activity.
-
Here you can see the different schedules of your activity. Click on the date you are looking for. You can also use the filters to search.


-
Click the Q&A button to see their answers from the additional questions you provided.
Check out this article to learn about how additional questions during registration works.
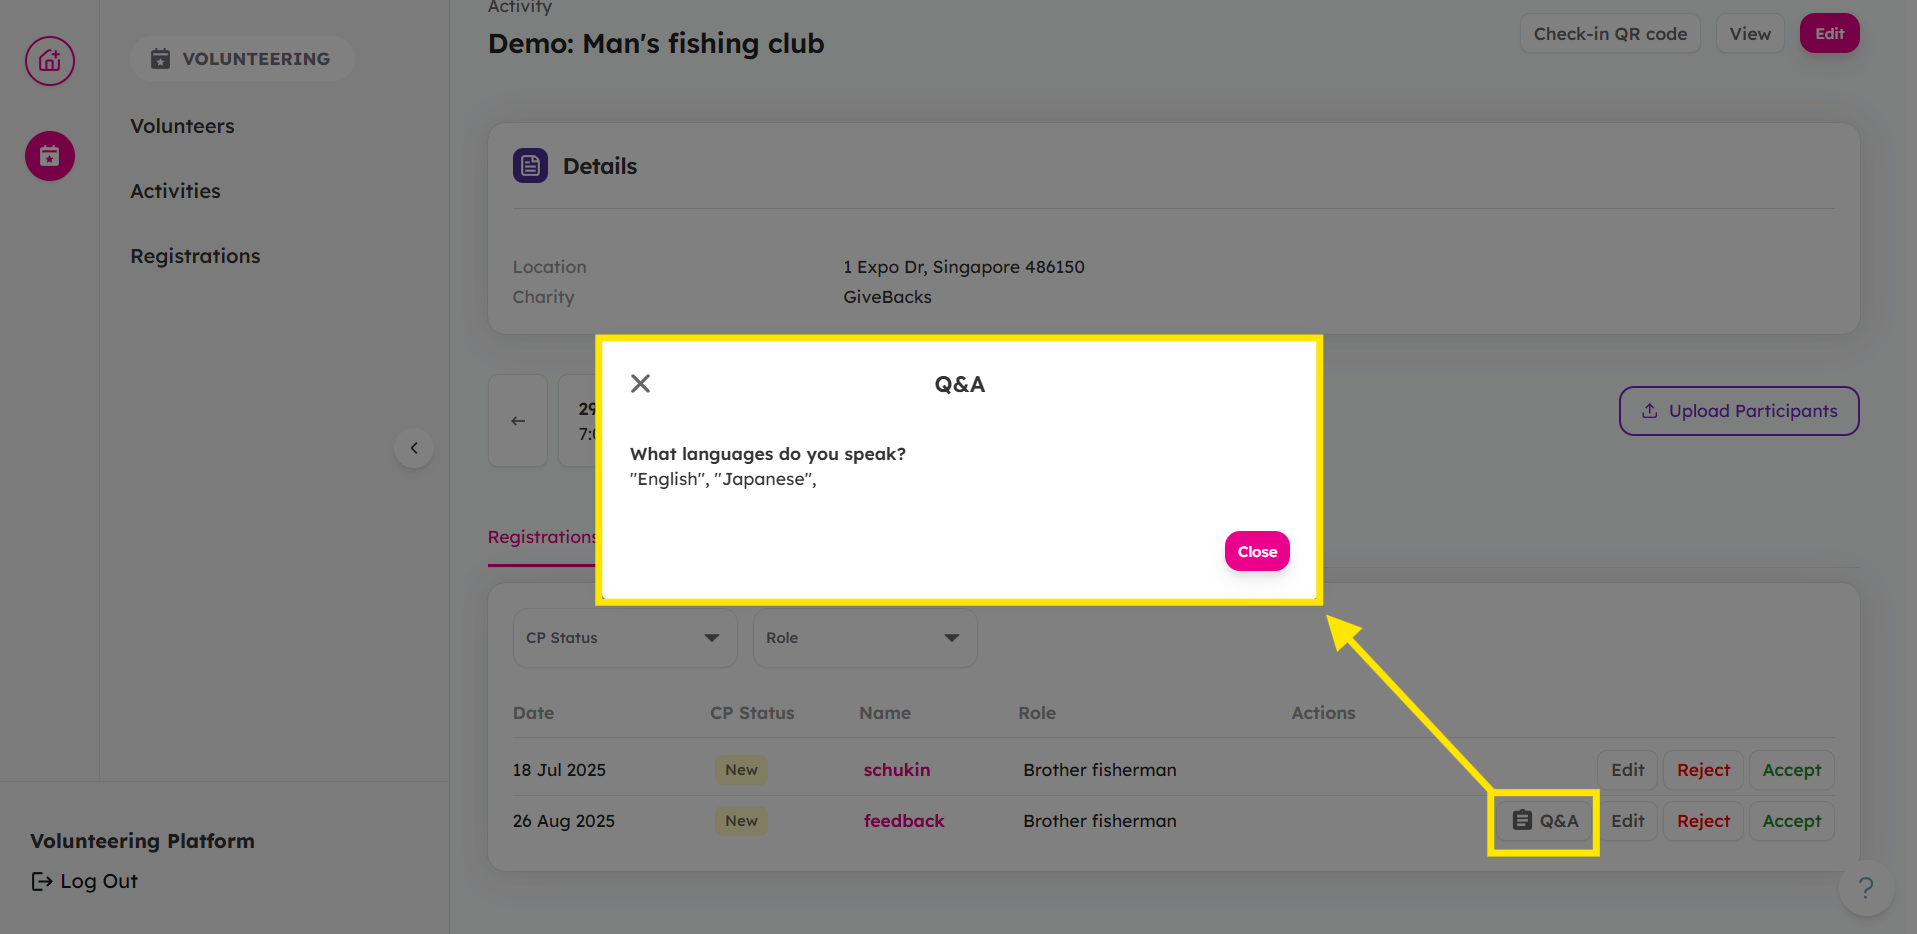
You have learnt how to find additional questions asked during registration process. Now check out this article to learn more about how additional questions can be added to activities!
-
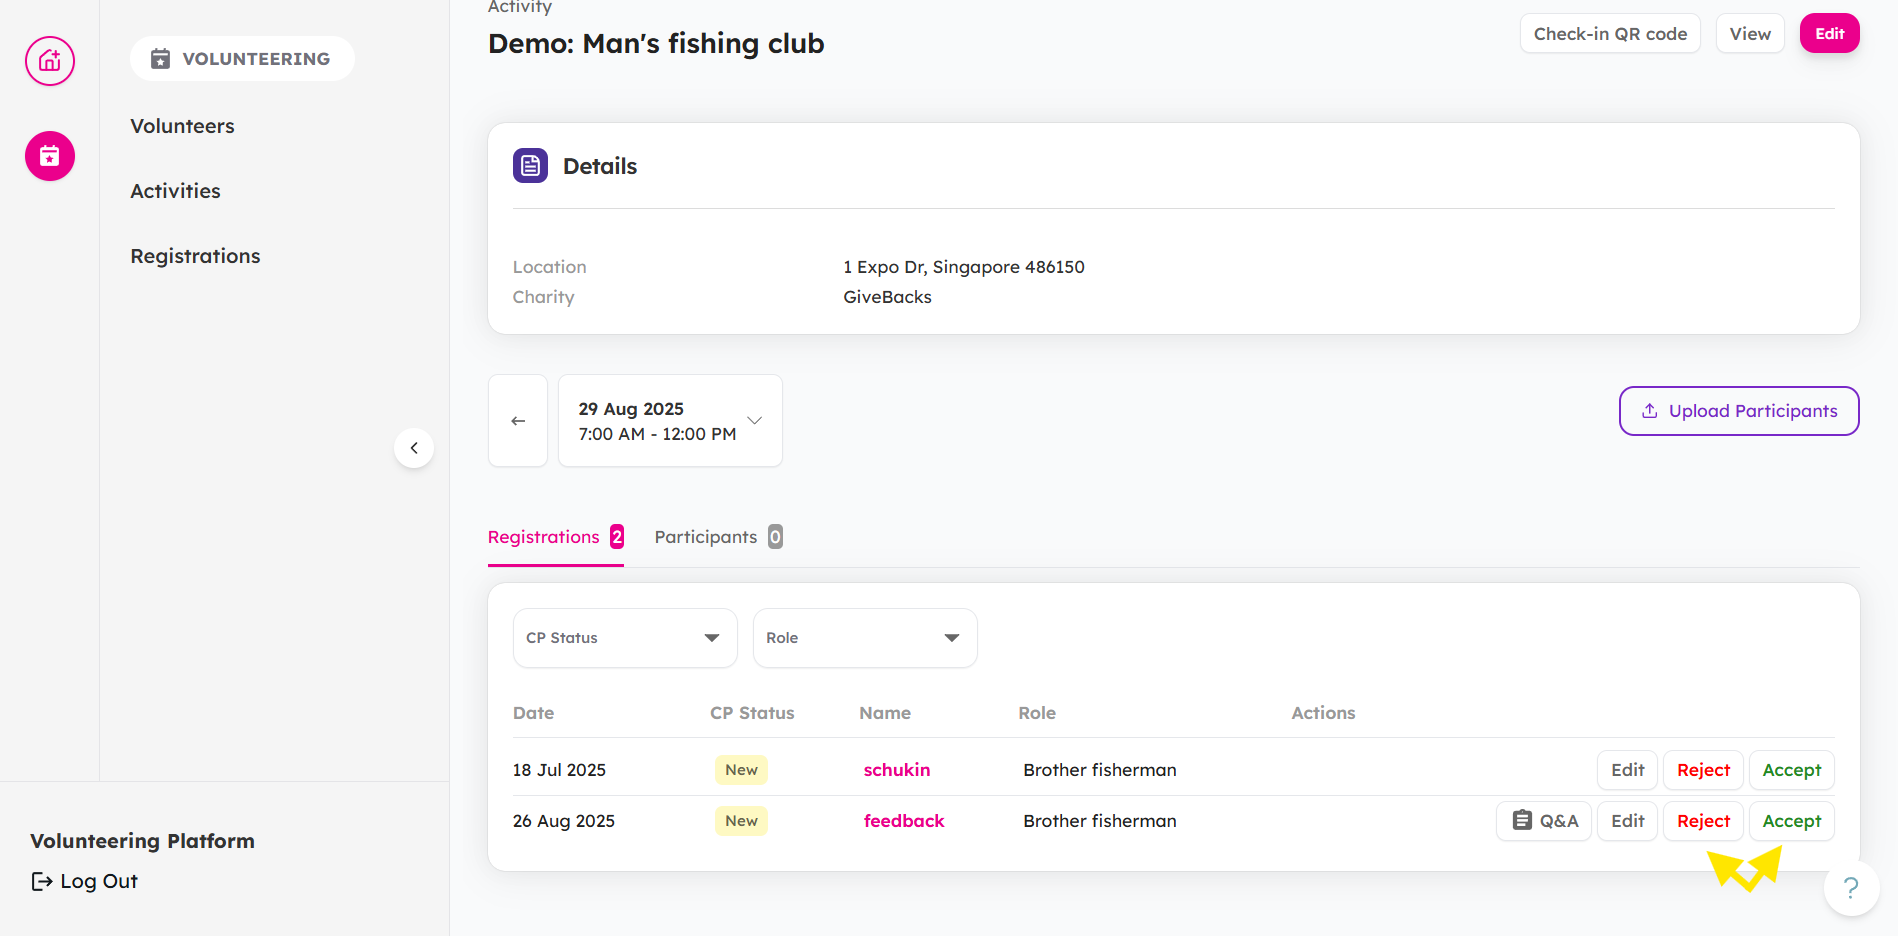
Here you can see the registrations and you can choose to Reject or Accept them.


Bulk Accept/Reject a Volunteer's Registration For Multiple Sessions
-
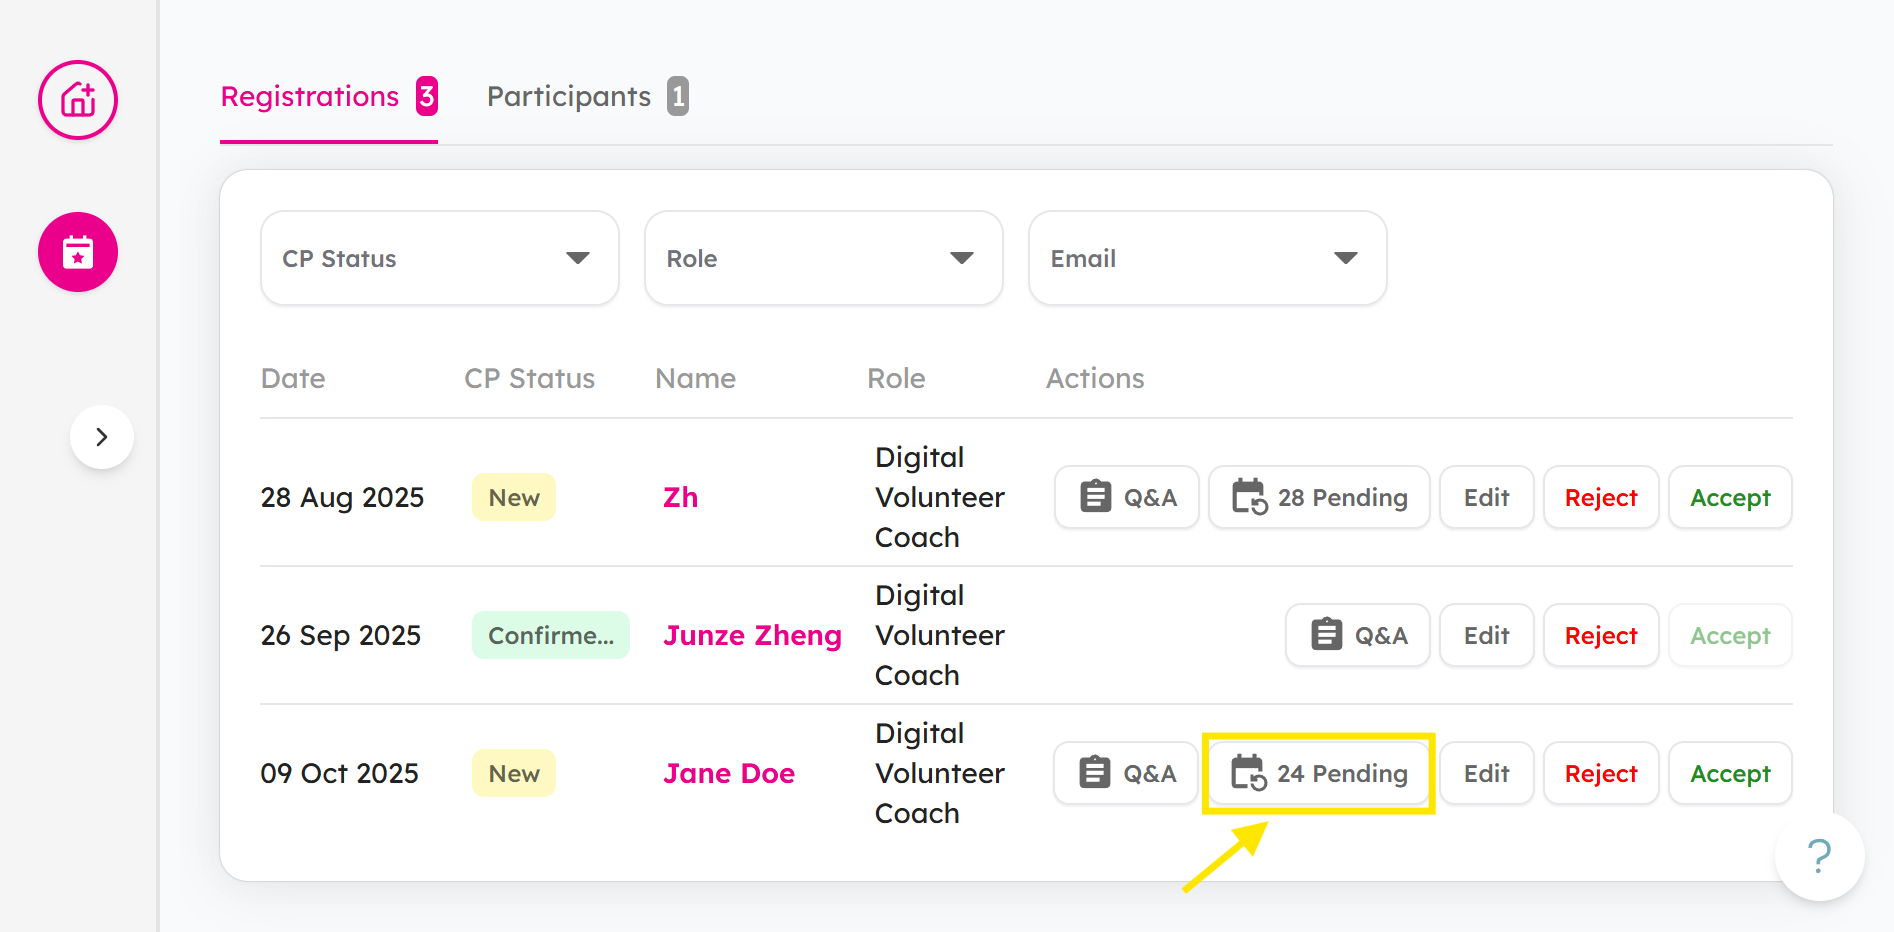
From the Registrations tab, choose a volunteer and click on Pending tab.
-
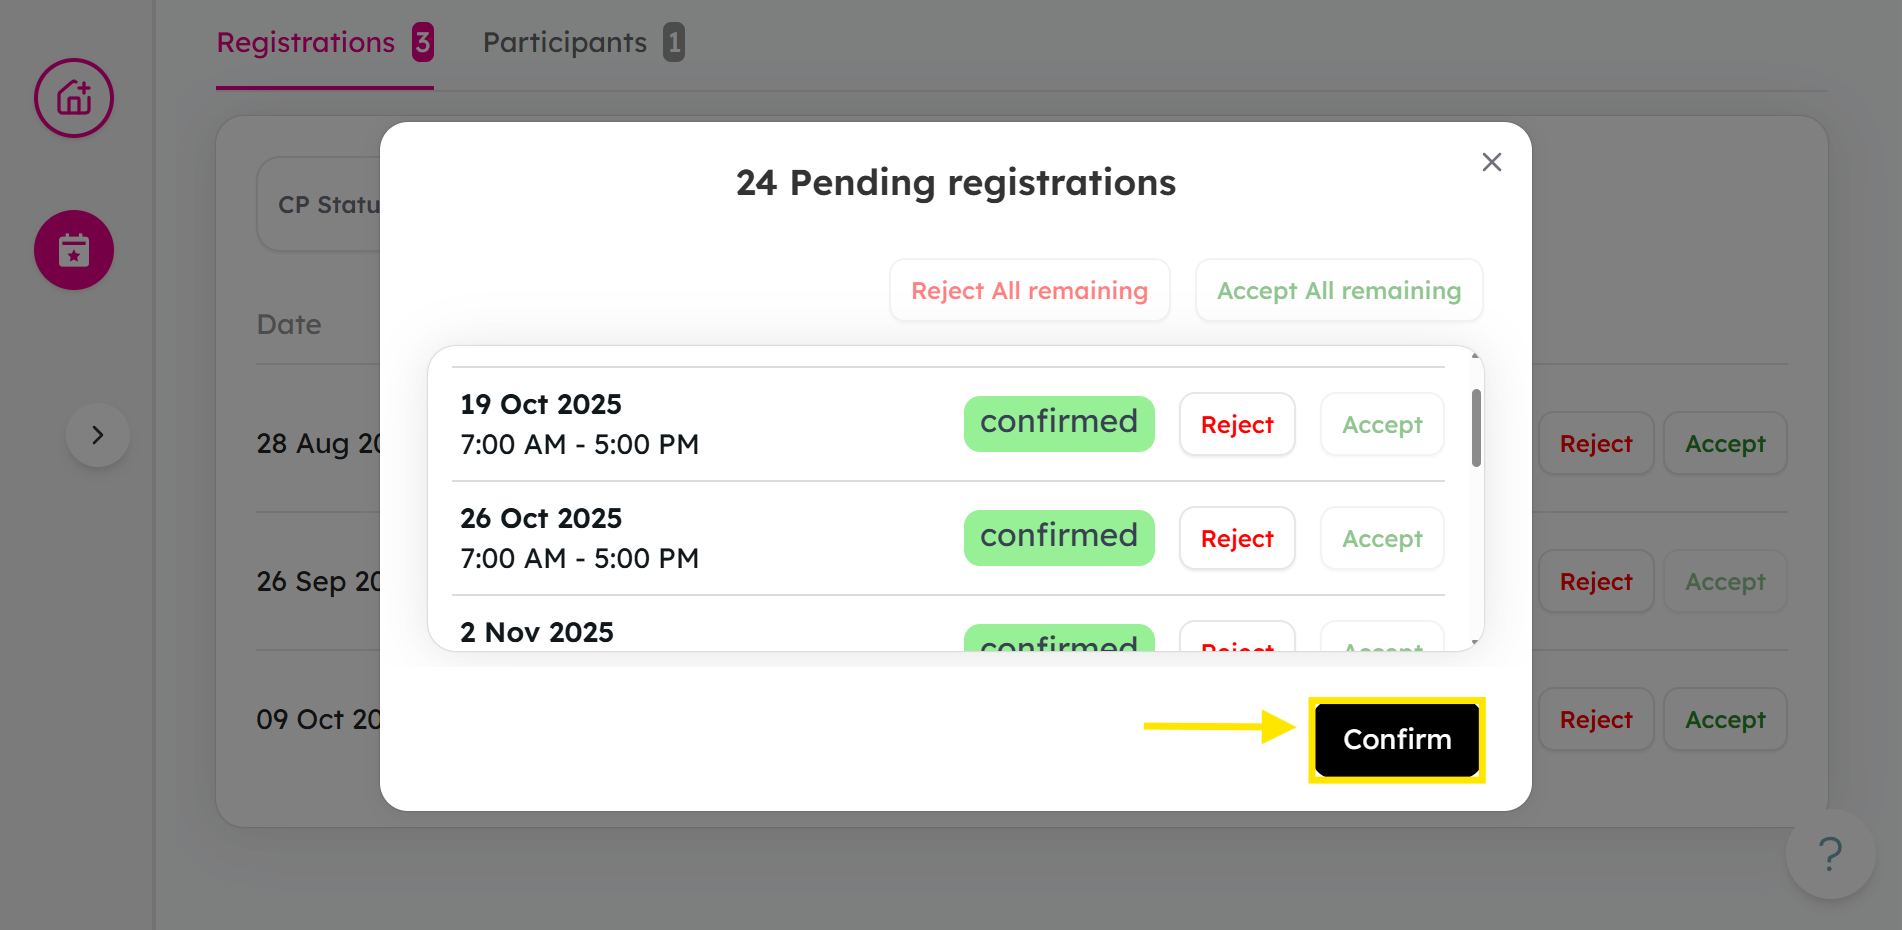
You can either choose to reject or accept all their pending registrations.
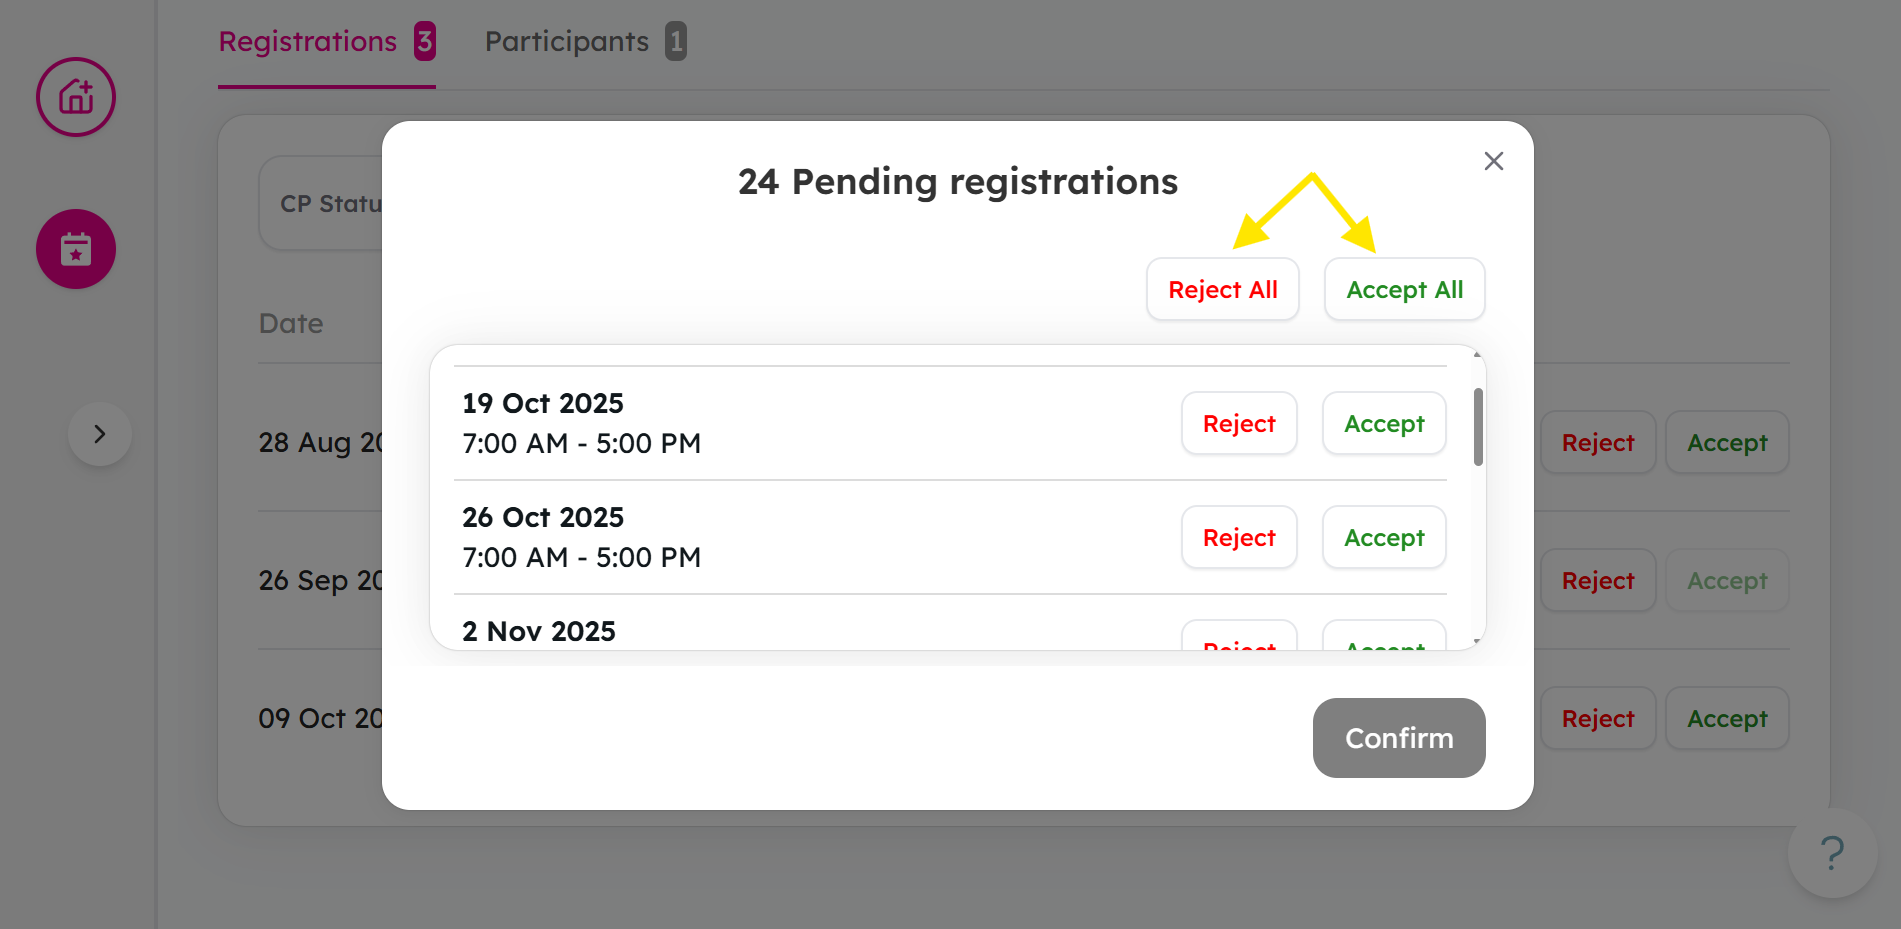
-
Click Confirm to process all registrations.


How will volunteers be notified?
Volunteers will receive a confirmation or rejection email based on your selection.
-
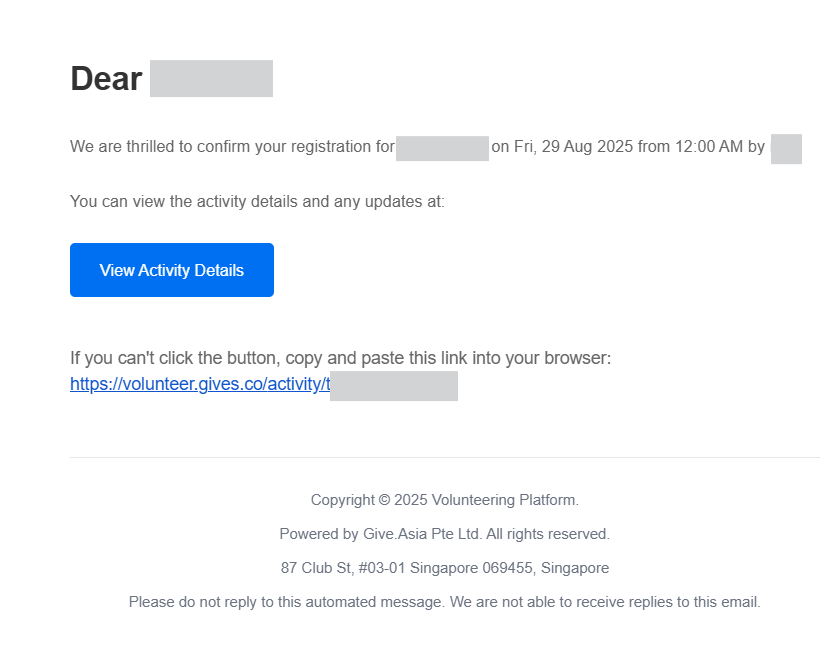
If they are accepted they will receive the following e-mail:
-
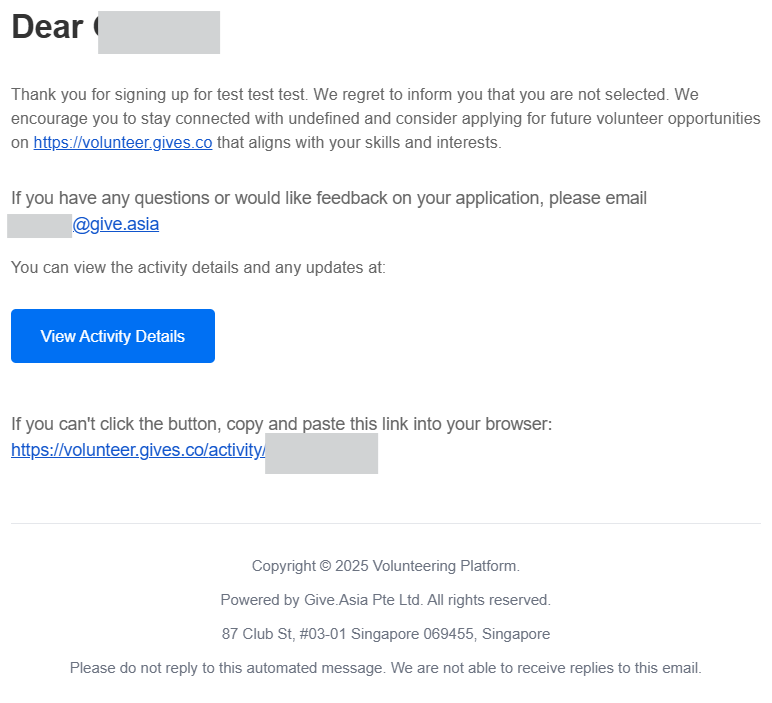
If they are rejected, they will receive the following e-mail:


Adding Additional Notes via CP Notes
- As a charity staff, you may also add notes to inform your VC about the volunteer for the activity. To do so, you can either access it via Activities, or via Registration:
-
From Activities Tab, select the activity → select the session
-
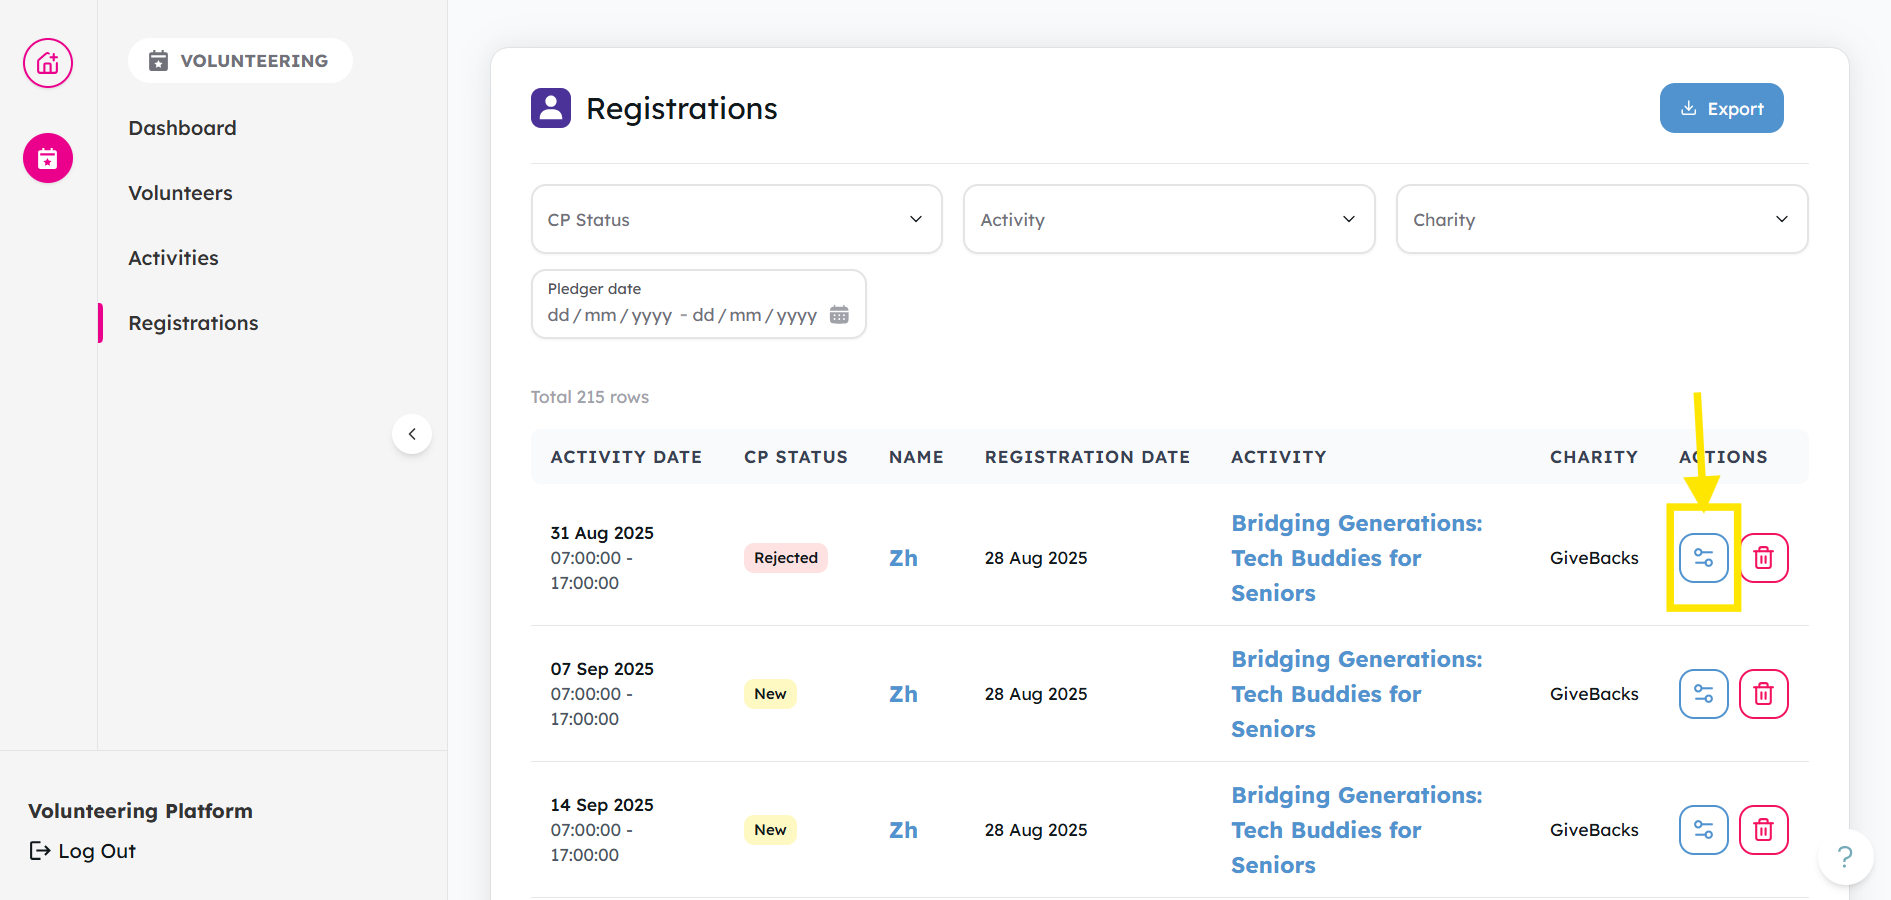
From Registration Tab. You can choose to filter before step 2
-
-
Search for the relevant volunteer, then click on edit and add your notes:
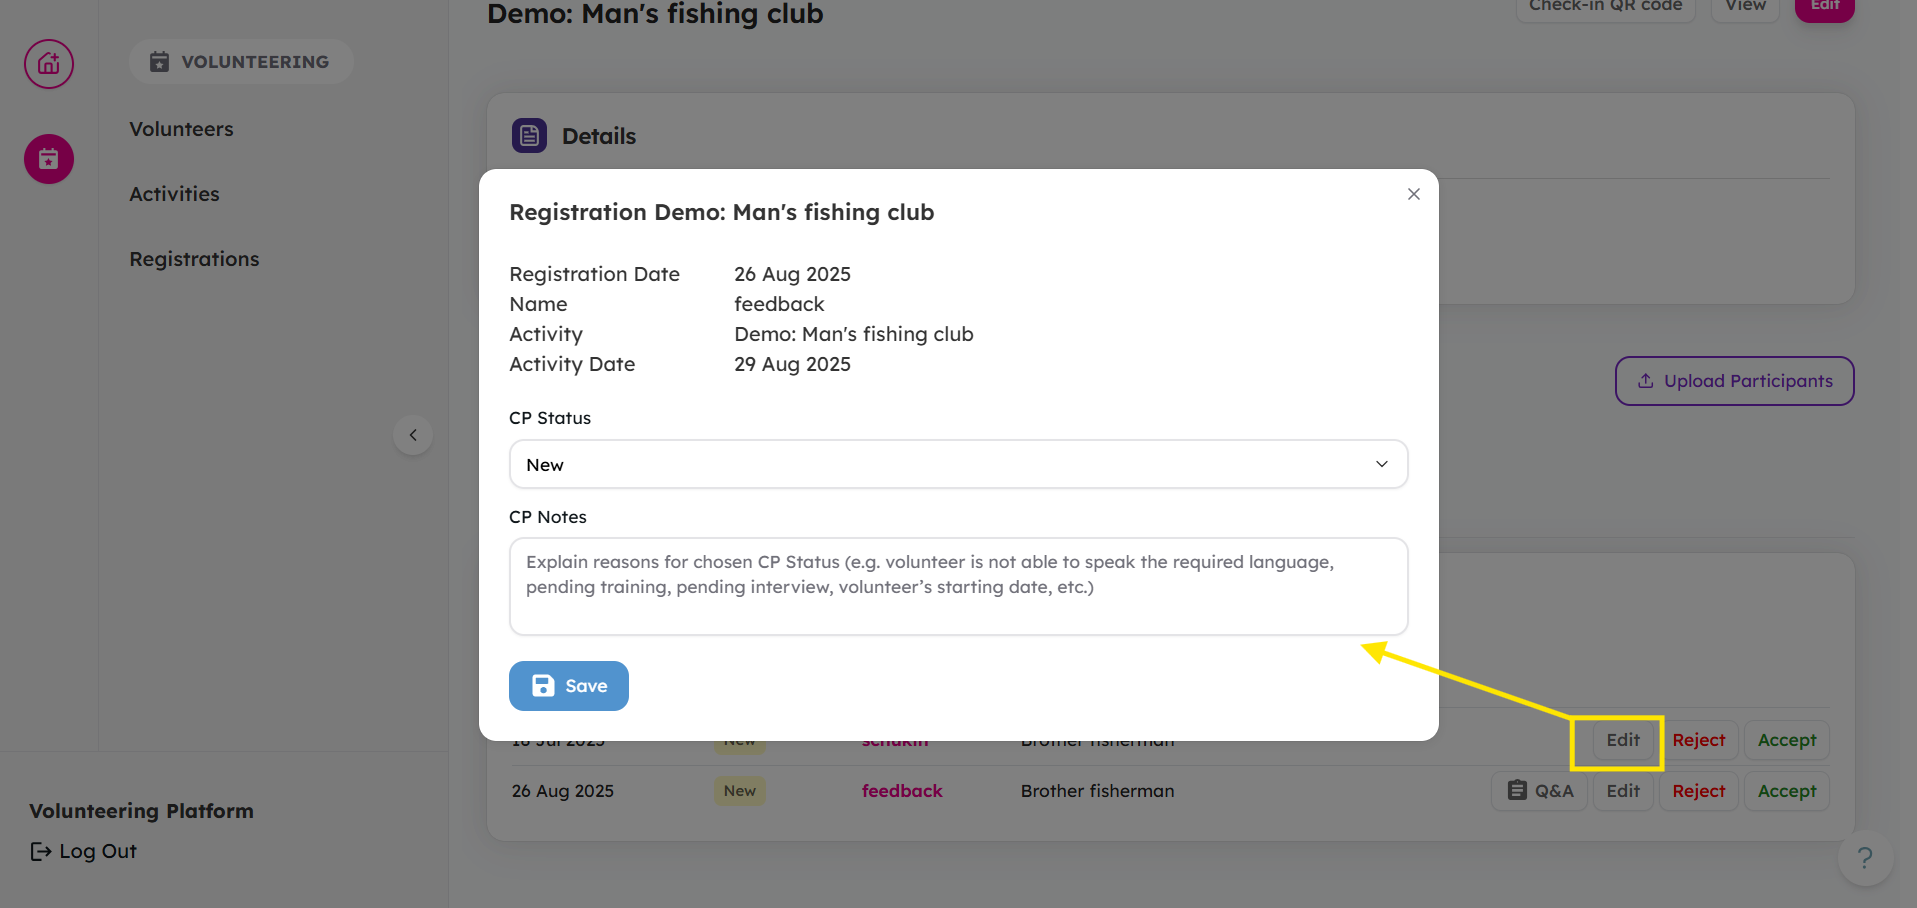
- Press Save to save your notes.


Ready to manage your registration? Log in and manage your activity's registration here!
If you encounter any issues or have questions, don't hesitate to reach out to us at: [email protected].
Your feedback matters, so feel free to drop us a line anytime!